
If you read our email marketing plugin overview, you probably know that MailChimp is one of the top email marketing providers out there. There are so many features included in this tool that you would be hard-pressed to find another service that comes even remotely close to the awesomeness of MailChimp.
In essence, MailChimp is an email marketing service which enables you to send an email to hundreds and thousands of people at the same time, but it also goes much further than that. All within the same tool, you will also have to opportunity to create, design, edit, and manage all of your email newsletter templates.

For those users who have never done this before, we prepared:
Step-by-step instruction guide on how to create a newsletter in MailChimp
MailChimp is an email marketing service that you can access on a desktop, mobile, iOS app or Google Play app.
For this guide, we will show you how to create a newsletter in the desktop version of MailChimp. However, it works just the same on other platforms too. Only the interface can be somewhat reorganized to be optimized for a specific platform.
Let's start!


After you put in all this info, you will have to confirm your email address. After clicking on the link to activate your account, you will see the following screen:
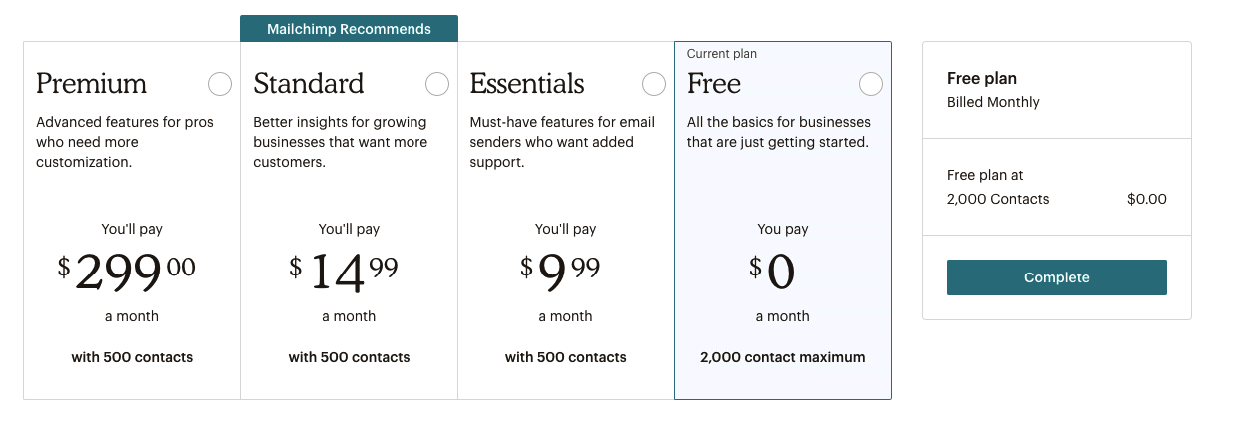

Free plan:
Don't worry, when you sign up for MailChimp, they won't try to scam you into subscribing to a paid plan. The free plan is the default, and this screen only serves as a reminder of all of the stuff that you can get with higher-value plans.
The fact that there are so many features included in MailChimp's plan is one of the top reasons for its enormous popularity all over the world. The majority of MailChimp users are running their campaigns on a free plan, and they're doing just fine.
This plan will give you access to 7 marketing channels and enable you to design and save five different email templates. Another perk included in the free plan is Marketing CRM, where you can access all of your reports and use insights to have a better picture of your email's performance.
Essentials plan:
This plan offers you a huge step from the free plan for only a small price ($9.99 per month). Of course, everything that you get in the free plan is included in Essentials, too.

Furthermore, there's the A/B testing feature included. Among other things, A/B testing is one of the most valuable insights you can have when it comes to email marketing analytics. It means that you can use two emails to compare their performance stacked against each other. When differences are highlighted, you can notice what you're doing wrong much more quickly. Of course, you can also learn which of your moves are a real hit and make sure you include them in your next email.
Along with all this, you will also get access to 24/7 customer support, which is not available for free users in this capacity.
Standard plan:
According to MailChimp, this is the plan that will give you the best value for its price. It's only $4.99 per month more expensive than the Essentials plan, but it comes with specific features that are way more valuable than that.
Some of the most interesting ones are retargeting ads and the ability to create a custom-code email template.
Next, to these advanced options, you will also get detailed and precise audience insights that will give you much more info than regular stats in Free and Essentials.
Premium plan:
The MailChimp Premium plan is intended for large enterprises and businesses for whom email marketing is the most critical marketing channel of high priority.
You might be wondering what makes a service plan jump from $14.99 to $299 per month, but you will quickly find out.
First of all, the Premium plan has advanced segmentation options. You can choose to include or exclude audiences for your next email campaign as precisely as you want to. You will also be able to stack email performance against each other in a multivariate setting.
Premium users also get phone support that's available 24/7 for all questions, issues, and email campaign emergencies.
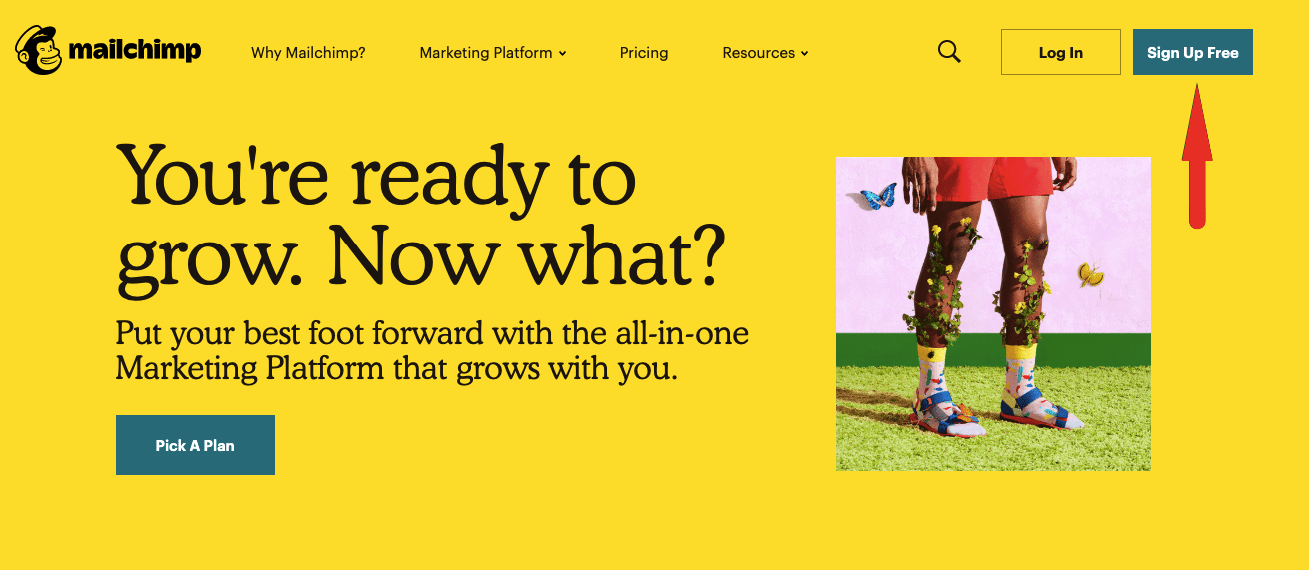
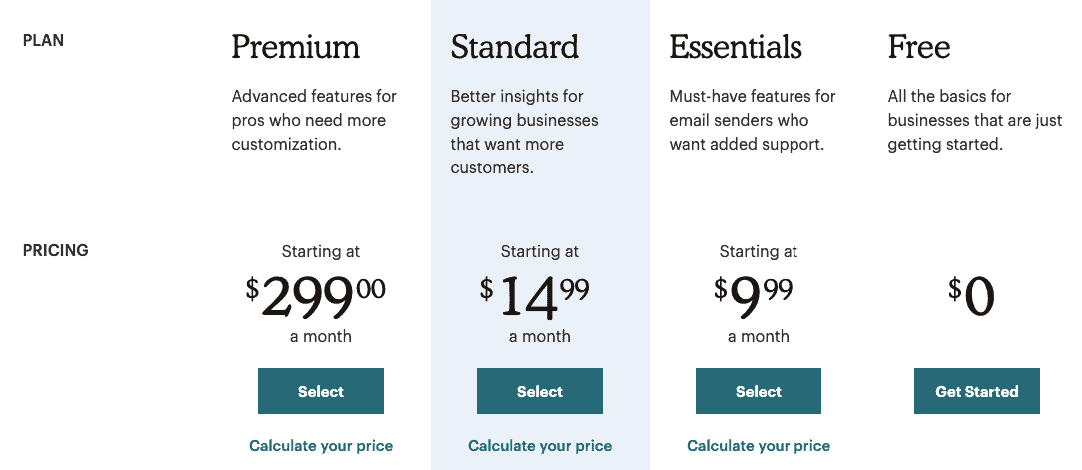
Pick a plan
At this point, you should decide which plan you want to use with MailChimp. Of course, you can upgrade your plan at any time. However, if you're creating an email newsletter for the first time, we recommend that you opt for the free plan. It has enough features packed into it that will allow for a great first campaign. Whenever you feel like you need more support, more complex analytics, or better access to templates, you can upgrade.
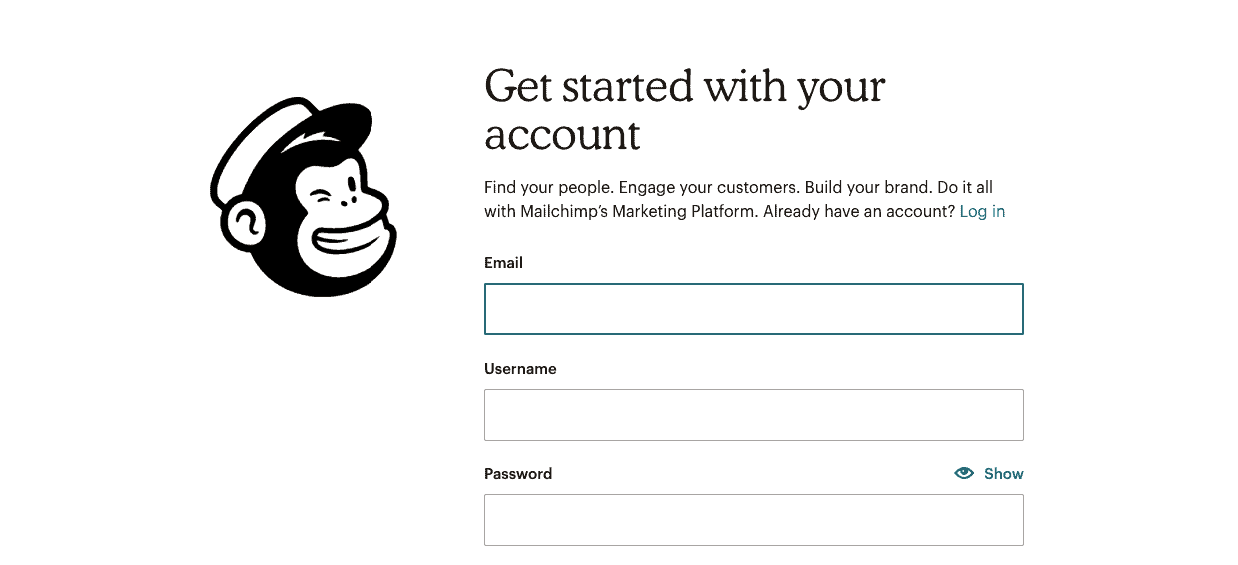
After you choose your plan, you will be required to provide a couple of info bits on your business:
- Your name: You should use your real name for anti-spam legislature purposes. You won't necessarily have to use this name as an email signature, as you will have an option to opt for your sender name at a later point.
- The name of your business: This name will be used for the default settings for all templates and emails in your dashboard. Also, don't worry about getting it right, as you'll have a chance to alter it later on.
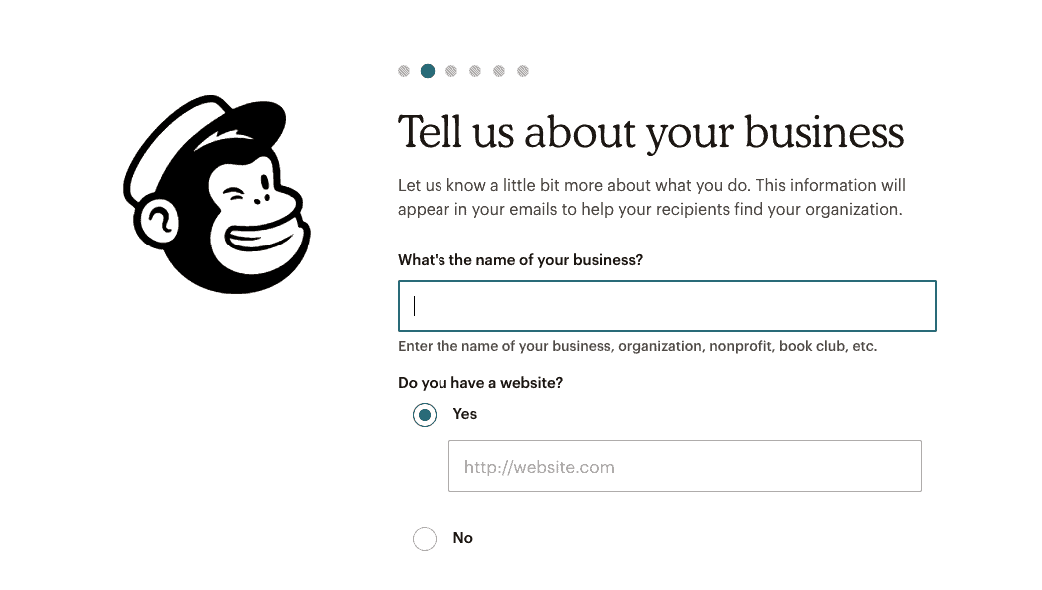
- Email list: you will be asked whether you already have an email list, you don't, or you're not sure
- Social media accounts: If you want, you can connect your Facebook and Twitter profiles right away. This will add these social media buttons to all your future emails.

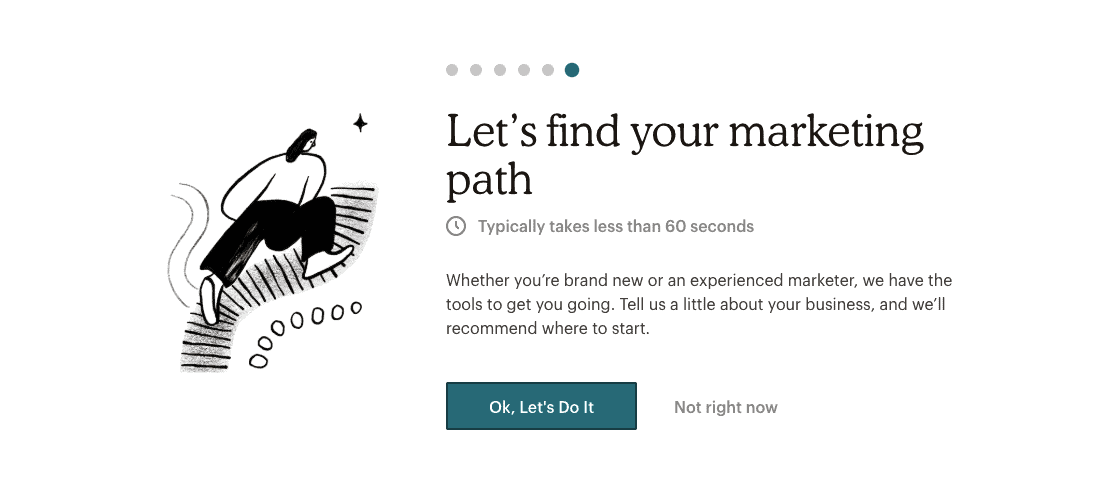

If you want MailChimp to give you more precise recommendations and tips based on AI technology, click on OK, Let's do it. It will only take a short while, and you will be required to answer the following questions:
-
Do your customers interact with your business mostly through your software or app’s interface? (Choose this if you're running a digital company such as a review site, real estate search site, dating app, SaaS or similar)
-
Do you sell things online? (If your email marketing goal is to sell a product from your website ultimately, choose this, regardless of your industry and niche)
-
Do you support bookings, ticket sales, or appointments online? (For sites that market off-site events, products, and services which are not carried out on the site itself)
-
Do you want people to talk one-on-one with a person? (This could be on the phone, online, or at a location.) (If you choose this option, your business phone number and physical address will be the central point of your email campaigns)
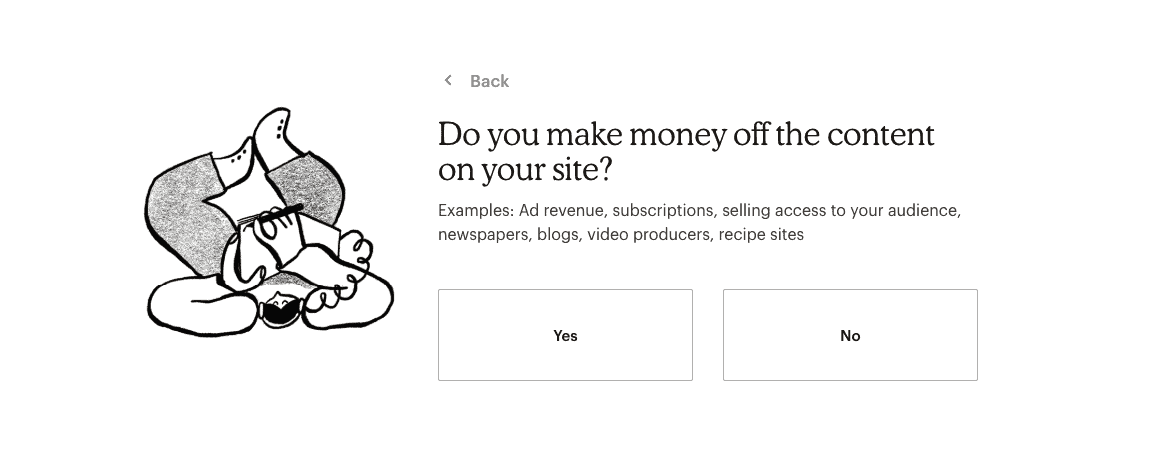

- Do you make money off the content on your site? (Choose this option if you monetize your website through ads or affiliate marketing in your content)
Getting Started
After you answer these questions, MailChimp will use this data to give you the best possible marketing tips for your future email newsletter campaigns. Then, you will be directed to the dashboard.
Congratulations! You have now arrived at the first point. To start designing your email campaign, click on the Create button in the upper right corner of the dashboard.
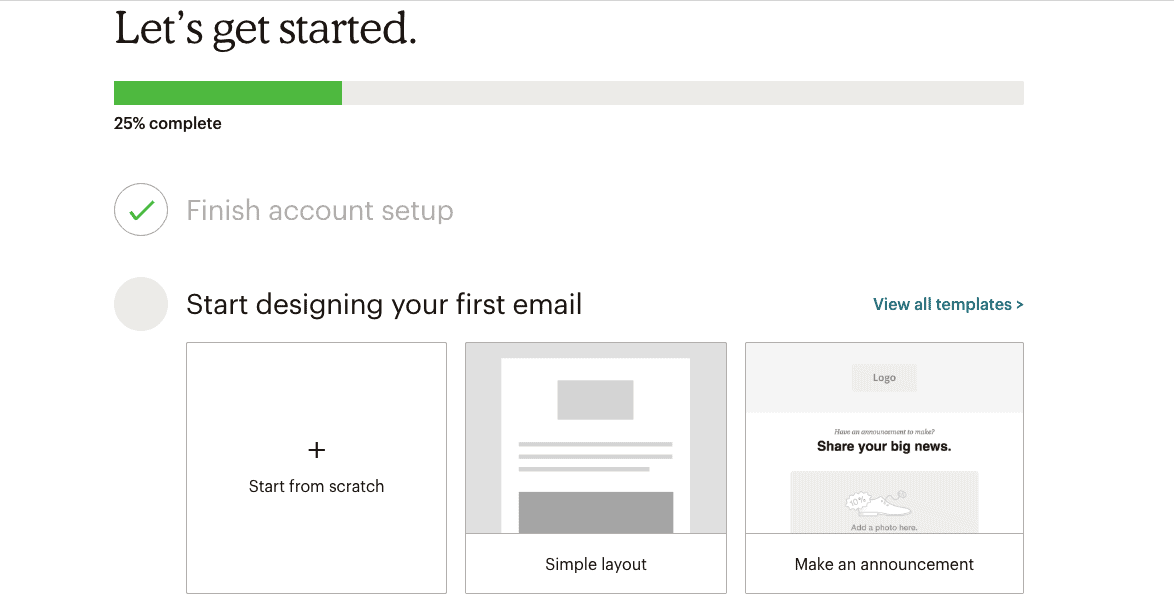

On the homepage, you can also click on one of these options to start designing your first email:
Choosing a template will make your job much more comfortable. When you're creating an email campaign, you can choose to either modify a pre-ready layout or a template. However, Featured designs are included only in the paid plans. These are layouts which are ready-made and tested out to perform different functions, like Sell Products, Make an Announcement, Tell a Story, Educate, etc.
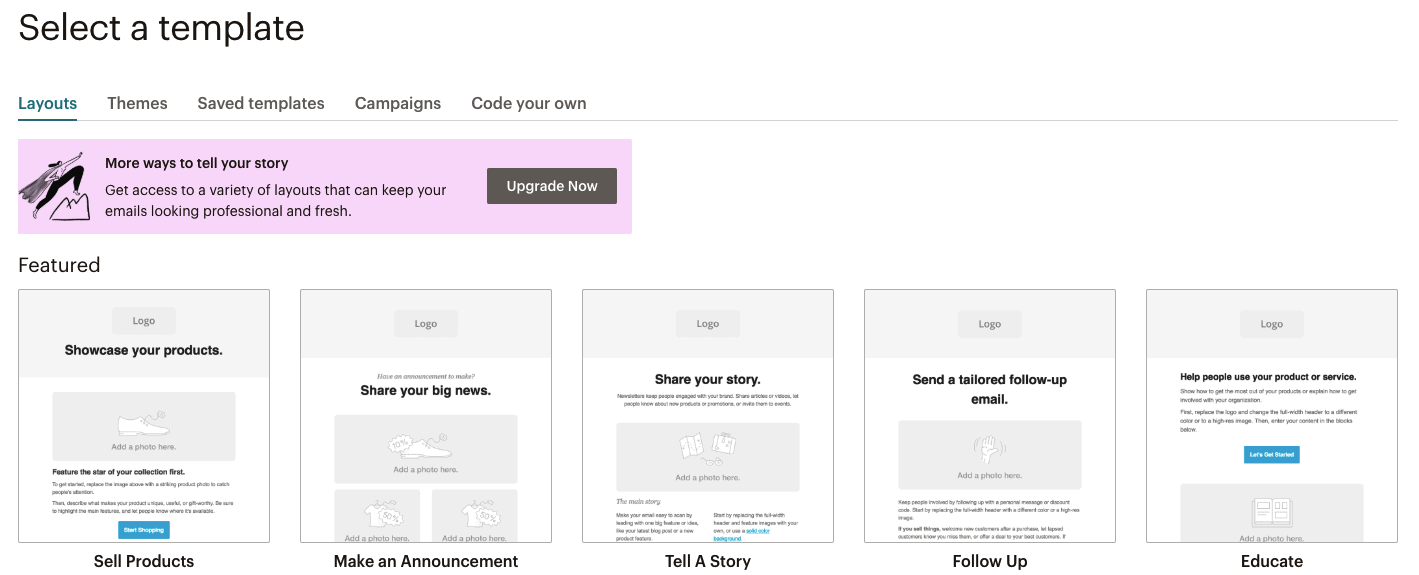

If you're using a free plan, you will have access to Templates. If you're looking to create an email campaign quickly and easily, this is a much more favorable option than Layout customization. You will have access to 8 Templates of the Featured category, but for all others, you will have to upgrade your plan.
Choose one of the featured templates based on your preferences and the function of your campaign. You click on it, and you will be directed to the customization area.
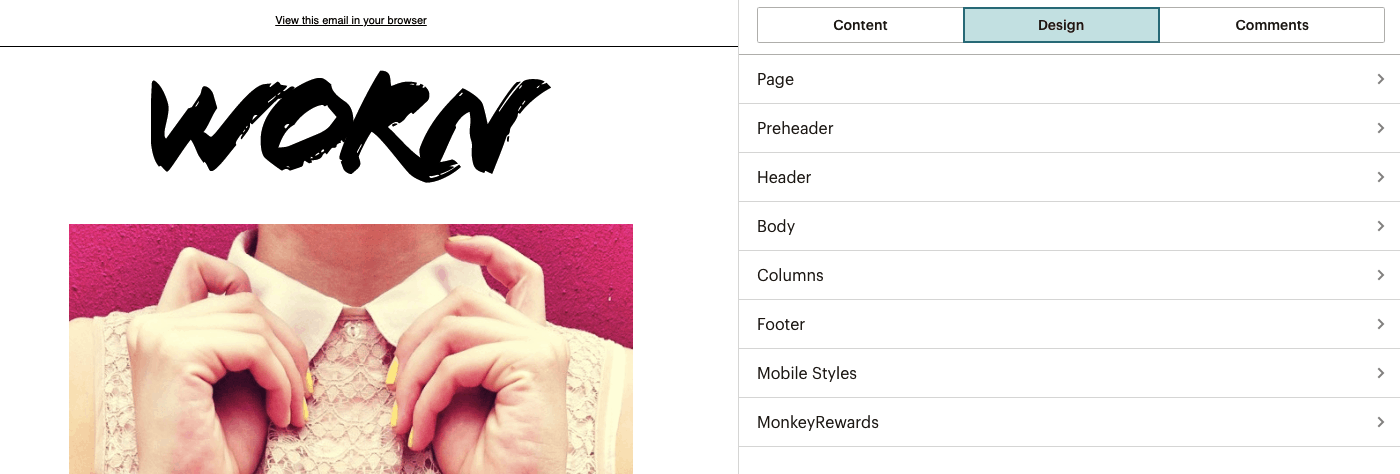
For example, we have chosen to customize the Boutique template:
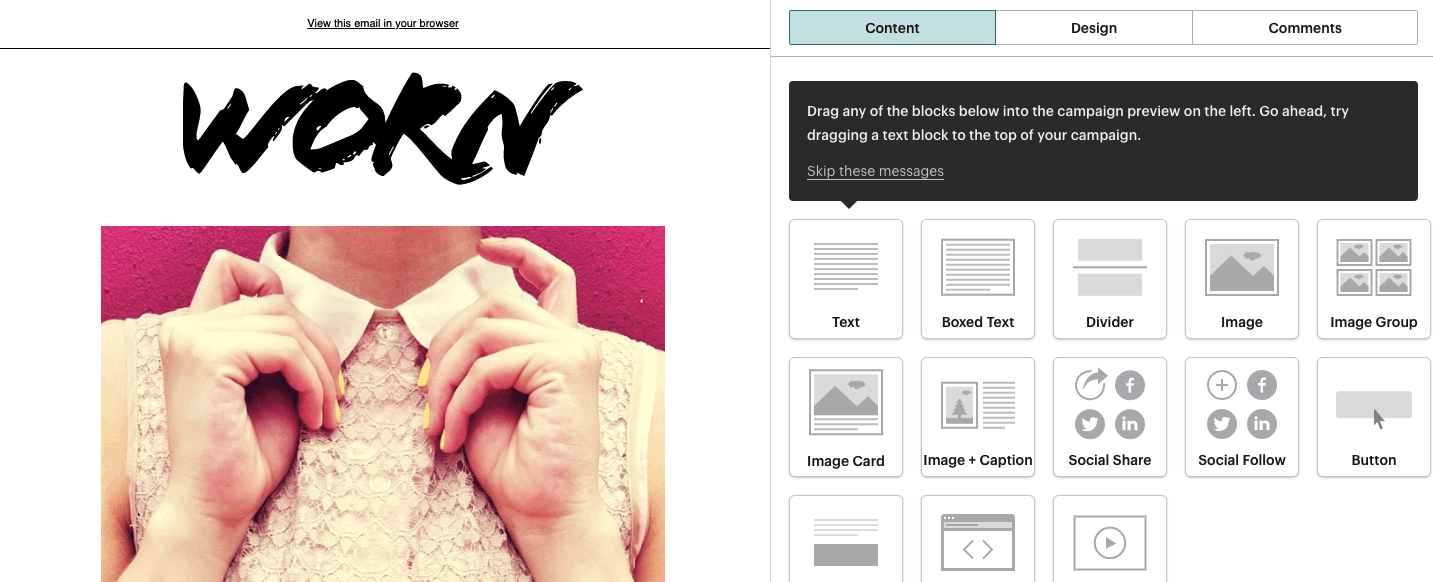

The sections are divided into Content, Design, and Comments.
Email Content
Here are all the elements that you will be able to add and edit within the ‘Content' section:
- text
- boxed text
- divider
- image
- image group
- image card
- image + caption
- social share
- social follow
- button
- footer
- code
- video
To add any of these elements to your email template, drag it to the left side and drop it into the section of the email where you want to place the element.
Email Design
Similarly to WordPress theme customization, here you can find all the commands that will enable you to manipulate the visual appearance of your email.
The design section lets you customize the following:

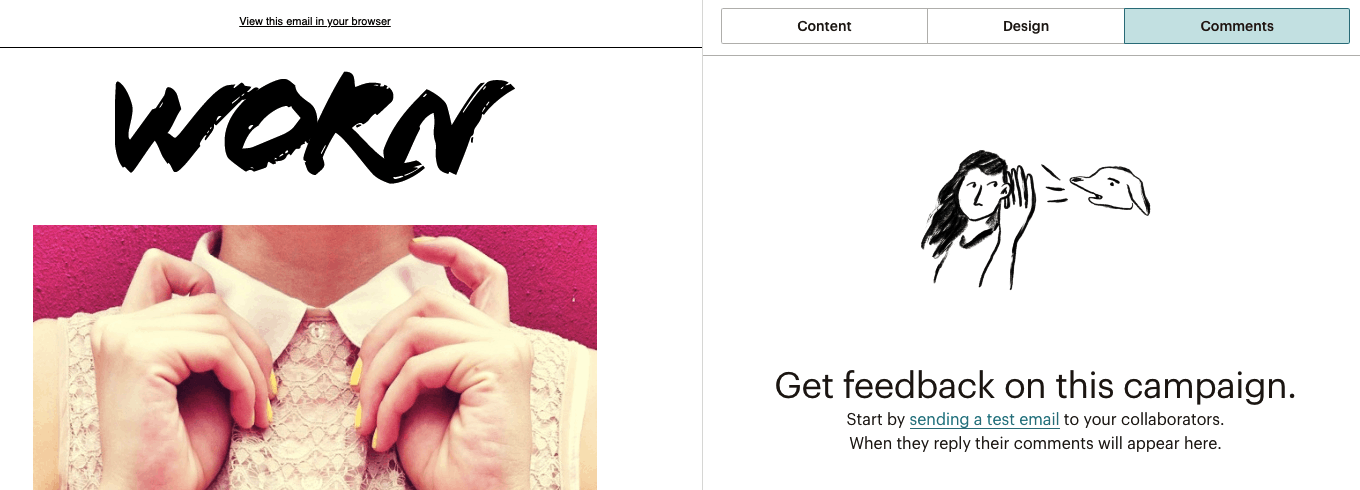
Email Comments
Finally, the email Comments section is a place where you can get feedback on the email template you've just created. To start receiving comments, you should send out a test email to your collaborators. After they start responding, their comments will be presented in this section.

Don't worry. When you finish up your email creating process in MailChimp, you won't have to send out an email to your subscribers, cross your fingers, and hope that everything works well. Before you launch an email, you should thoroughly check for any possible mistakes. You can do this through the ‘Preview and Test' option available on the top of the page.
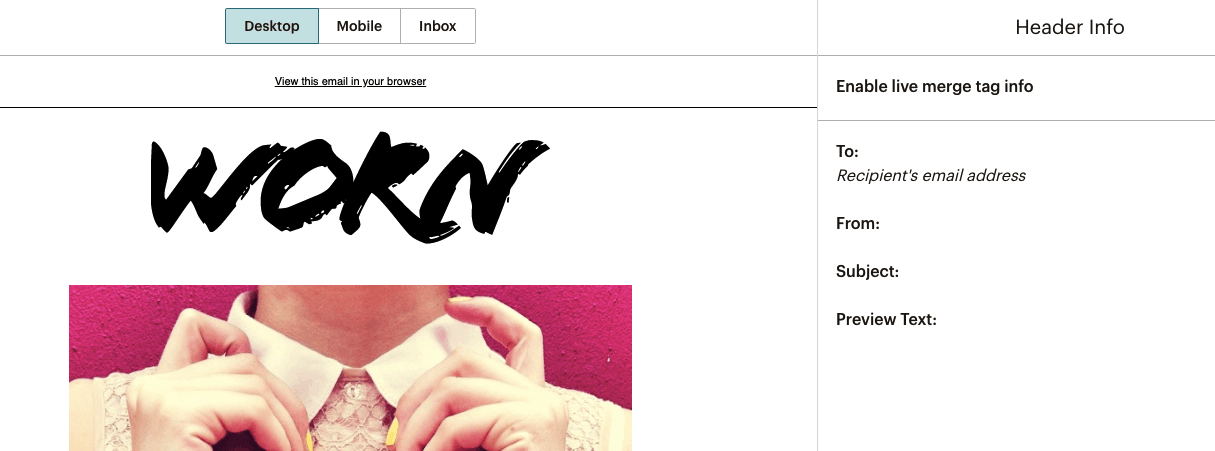

- To:
- From:
- Subject:
To:
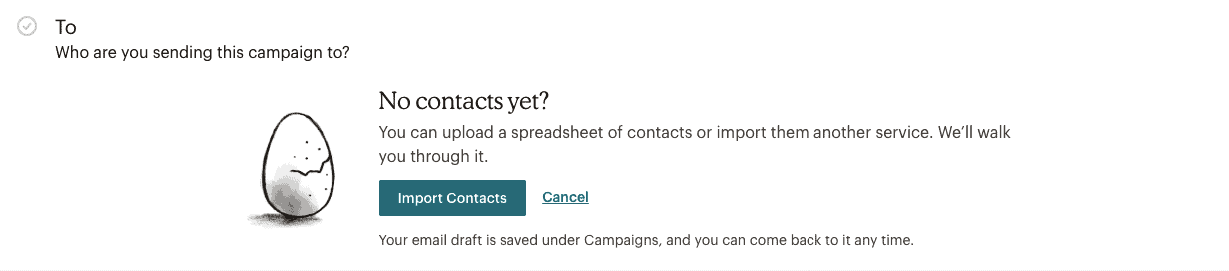
The To: field, of course, stands for the recipients of your email. Click on the ‘Add Recipients' button to set this up.
Then, you will have to choose an audience for the email that you're trying to send out. Choose an audience from the drop-down menu. If you haven't created an audience before, you can do that by clicking on the ‘Audience' section on the top of the dashboard.
You will have the option to import email addresses of your audience from a table file (Excel) or .txt file. You can import contacts to one of MailChimp's integrated services. MailChimp currently supports email import from Google Drive, Google Contacts, Salesforce, Eventbrite, Zoho, Constant Contact, Capsule, Zendesk, and Fresh Books.

From:
To choose what your recipients see when they receive your email, enter the name you prefer and the email address that you want to show to them.
It's recommended that you choose a name that your audience will instantly recognize. Also, some marketers recommend that a personal name can have many benefits for email marketing (more personal approach, higher CTR…).
Subject:
As you know from your own experience as an email user, the subject of an email is incredibly important when it comes to whether a user will open the email or not (or even delete it without opening it).
MailChimp has prepared a great guide on how to write a good subject line.
It also supports Emojis, but you need to be careful on which ones you use: they might end up being broken with some of your users.

