
WordPress allows everyone to start a website. Whether it's a simple travel blog or a complex e-commerce system that will help you turn millions of dollars, you need to start somehow. While it is completely ok if you start your simple site by directly connecting to your hosting, more complex websites need more development time, which is why it's always a good idea to set up a coming soon page while you're doing the work under the hood. And that means finding all the right plugins, setting up the system and probably some custom coding.
People who develop sites tend to use a local development environment. Why? Because it is much easier to work locally where no can see your work until you're ready to show the site to the public. Also, no matter how fast your internet connection is and how expensive your host may be, nothing can beat the speed of a local environment.
One of the most popular PHP development environments is XAMPP (if you think you can pronounce this correctly, check the first second of the attached video below and be prepared for a surprise). It can be used both by beginners and professionals, and you actually don't have to know much about PHP & database systems in order to use it. After a quick installation, you will get to install WordPress locally and work on your new site. You will be able to install plugins & themes, try things out and learn WordPress without worrying you will break something. Because even if you do – it was just a local environment you can easily reset and start over.
But although installing XAMPP is easy, updating XAMPP takes a few steps extra.
Why Should I Update XAMPP?
Chances are that you, just as we did, have an old version of XAMPP installed on your computer. And just like WordPress and its extensions get updated, so does PHP and the database systems. And you simply have to keep up. You can always tag along and run an older version until stuff stop to work. Then you get in trouble and have to deal with updating while you are supposed to be working on something important instead.

You will definitely be able to get away with an older version until WordPress or one of the plugins you wanted to try out screams for attention. And once that happens, you will need to update XAMPP to a newer version. Yes, we hear you – it is possible just to update PHP but trust us – it is much easier to update the entire XAMPP instead.
How to Update XAMPP?
To be honest, we were shocked when we tried to update XAMPP. The modern life has taught us that every new software and a new app has an update button that will do everything in a click. So when we started to browse XAMPP settings to find an update button, we were quite surprised there wasn't any!
Alright, so it was time for a manual XAMPP update. Although it's not really complicated to update XAMPP to a new version, we decided to conduct this tutorial to show you everything step by step. In short, to update XAMPP you have to do the following:
- Backup files
- Export the databases
- Uninstall XAMPP
- Download & Install the new version
- Set up PHP limits
- Import the database
- Copy the backed up files back to the XAMPP folder
Doesn't seem that scary, does it? So, let's just get it done so you can continue working on your local WordPress blogs.
1. Backup Files
If you remember the time when you installed XAMPP for the first time, it came up with a specific folder. By default, the system stores its files into C://xampp. The folder that you need to backup is located at \xampp\htdocs\ directory. The htdocs directory holds all your website files, so if you would like to continue the work on existing local websites (which you probably do if you're reading this), it is crucial that you make a backup of this folder.
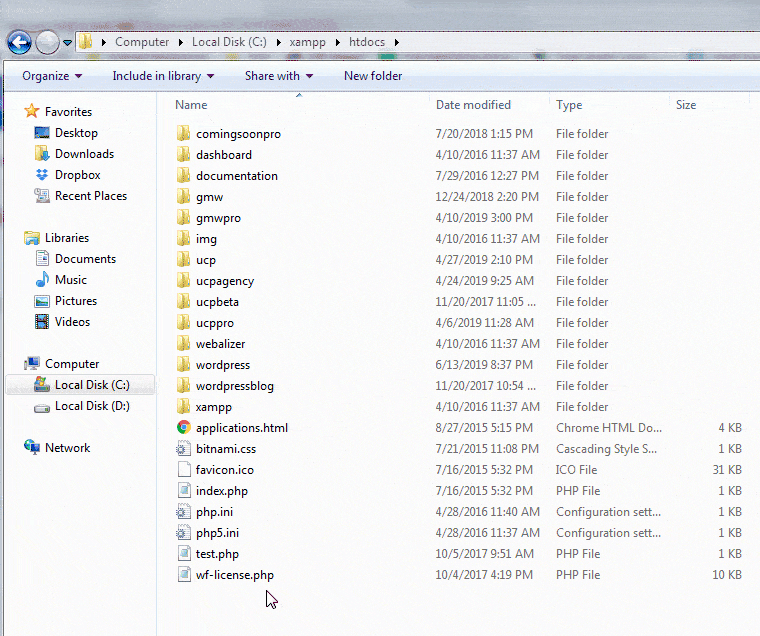

Simply copy the entire htdocs folder to a new location (desktop will be just fine since it is a temporary backup and you should be done in about 10 minutes) or open it and select the folder you want o save. Double check that everything's copied on a safe location, and you can move on the second step.
2. Export the Databases
WordPress is a dynamic system which means it uses databases to function properly. Although you have the files copied to a safe location, you won't be able to restore local websites until you back up the corresponding databases as well.
If you're not a developer, this may sound scary because databases are a technical term that easily scare beginners. But don't worry, you can export your database even if you have no idea what are they used for. We'll skip the technical talk and show you the quickest way to do this.
- Open XAMPP Control Panel
- Click the “admin” button next to the MySql row

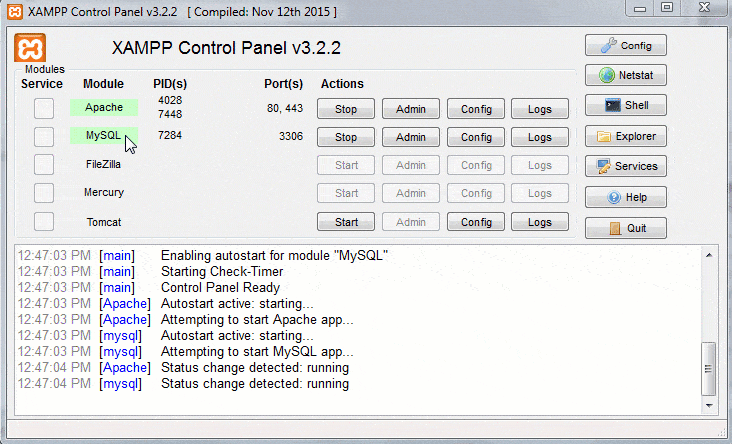
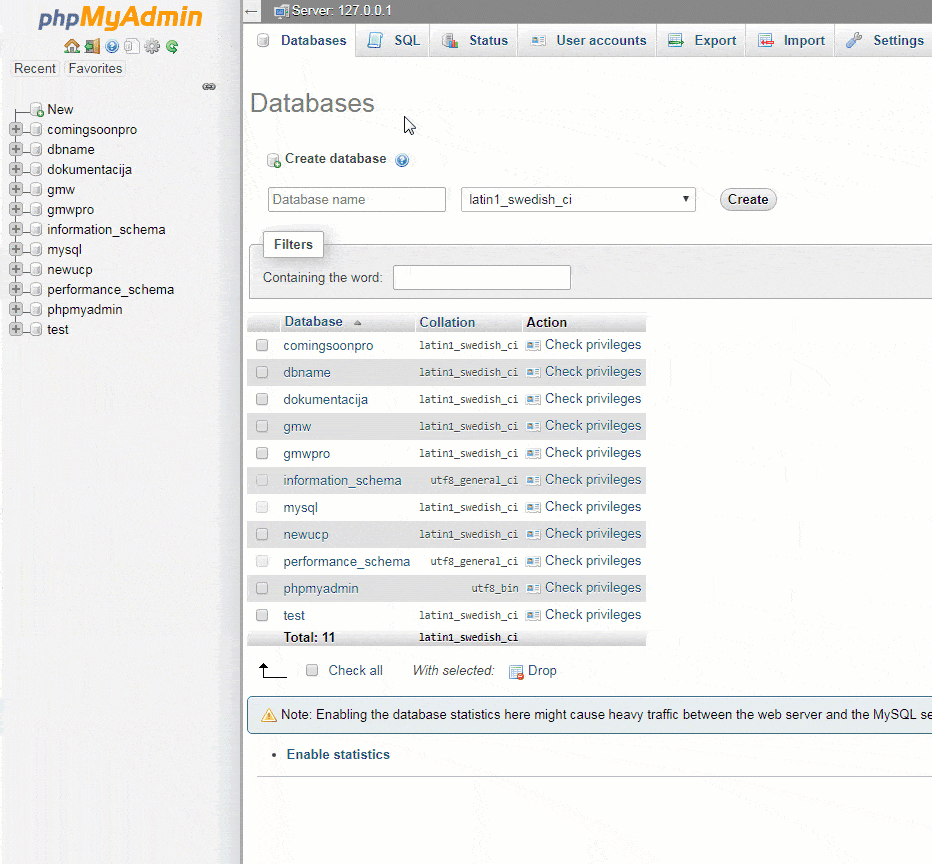
This will open a new window and send you to http://localhost/phpmyadmin/.
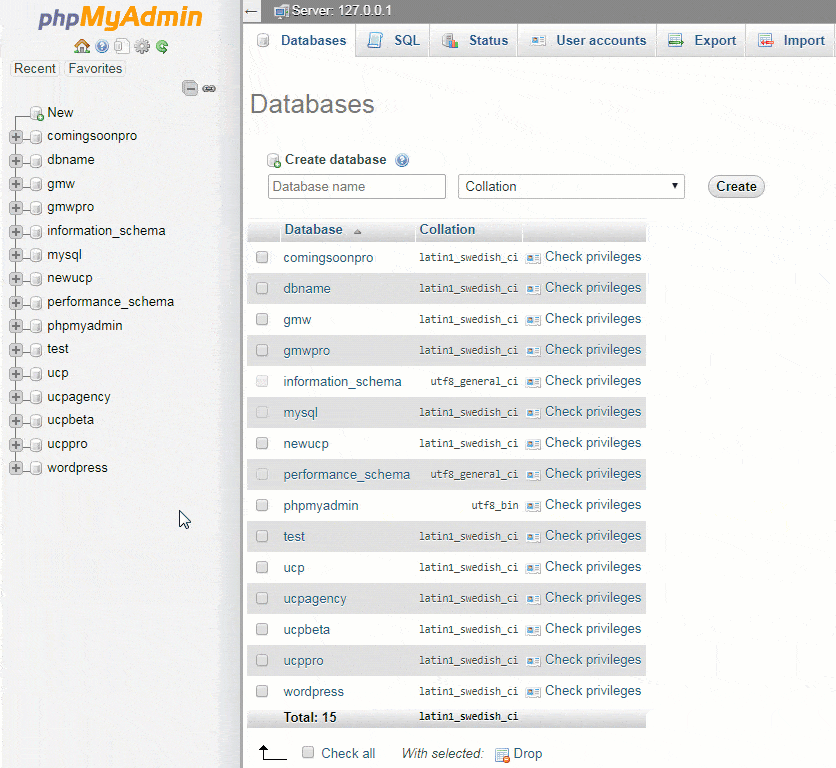
- Choose the “Databases” tab
- Select all databases by choosing the “Check all” button at the bottom of the screen
- Go to the Export tab
- Click the GO button

3. Uninstall XAMPP
This is a really easy step. Just go to your Control Panel and uninstall XAMPP completely. Once you start the uninstall process, XAMPP will ask you if you want to keep the htdocs file. Since you have already exported the files, choose not to keep it.
We understand that now it seems redundant to do the backup process manually that we explained in the first step, but if you keep the files, you will have to install the new version of XAMPP to a different location or do the backup process at this point. So, there's a reason we told you to do so.
Let XAMPP have a minute to uninstall everything. Once it confirms it's done, you can move on the next step.
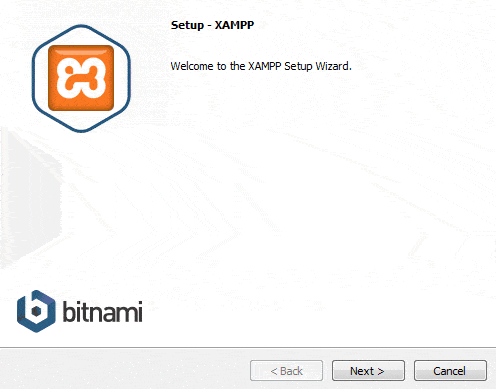
4. Download & Install the New Version
Now it's time to get a new version. Open https://www.apachefriends.org/index.html which will show you the latest version of XAMPP for Windows, Linux, and Mac.


Choose the one for your system, download it (the latest version was about 140MB at the time we were writing this) and install the new version.

Before you get to import everything, we suggest that you update PHP memory limits. By default, you will be able to import only up to 2MB large databases. In case you have multiple databases, the chances are that you will end up having a file larger than that. And if you don't update the memory limits at this point, you won't be able to finish updating XAMPP.
- Open XAMPP control panel
- Click the “Config” button in the Apache row
- Select “PHP (php.ini) option
This will open the php.ini file which you need to edit. To make everything right, we suggest that you edit the following lines (just hit the CTRL+F to search for the terms):
- Upload_max_filesize
- memory_limit
You can change the limits to anything you want. Don't forget to save the changes done to the file.
Also, make sure that you stop the Apache server and start it again in order to make it recognize the changes.
6. Import the database
Everything's ready for the import. So open the XAMPP control panel one more time.
- Click the “Admin” button next to the MySql row in order to open phpMyAdmin
- Select the “Import” tab
- Click the “Choose File” button and locate the database file (.sql file) you exported earlier
- Click the “Go” button at the bottom of the screen

7.Copy the backed up files back to the XAMPP folder
Now you can go back to the XAMPP folder and restore the files you backed up in the first step. Simply copy/cut them back into the htdocs folder. And voila, you have successfully updated XAMPP to the new version!
Conclusion
Once you have XAMPP installed, you probably won't need to update it for more than a year. But before you get in trouble because WordPress isn't working properly on your local installation, take those 10-ish minutes to update it correctly and enjoy working on your new site, theme or plugin.