
Multiple situations will require you to export and import products in your WooCommerce store. Migration of your WooCommerce store, the bulk update of store products, etc., are examples for such situations.
Although WooCommerce has built-in facilities for import and export of products, they are very limited in features and may not be able to meet your requirements. Like there is little control over the products that you can export or import.
This calls for the installation of a plugin that is much more capable of helping you with these tasks (besides more progressive WooCommerce dropshipping apps). Product Import Export Plugin for WooCommerce would be an ideal choice for a plugin. Regardless if you are talking about hundreds or thousands of products in your store that belong to different product types.
This article explains to you in the simplest way possible how you can import and export products in a WooCommerce store using the built-in feature.
Also, how the Product Import Export plugin works when it comes to import and export of products and product variations, etc. After that, you will be able to focus on other things like boosting your ROI with the largest marketplaces.
But before getting into all of that technical info, we have to introduce you to a tool that will be appreciated by anyone in the eCommerce business, and that tool is called Evidence.


Simply put, using Evidence you'll get to display customized social proof notifications for purchases, registrations, etc. So, for example, if a customer completes a purchase on your site, all the other customers currently browsing it will get alerted.
Best of all, the number of social proof campaigns you can create is unlimited. Meaning you can have one for each of your strategies and goals.
And if you really want to maximize your eCommerce store's revenue, consider also using a tool called Spott, which will increase session times, sales leads, average basket value, and traffic by using interactive content the right way.
Now, let's get back to importing and exporting products in a WooCommerce store.
Import Products to WooCommerce
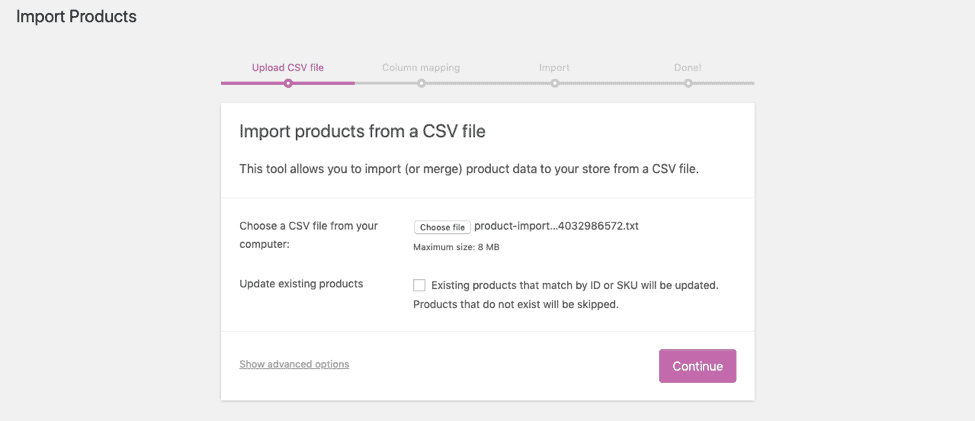
To import products to the WooCommerce store, first, you need to have a CSV prepared beforehand that lists the products and the product details. Then all you need to do is upload the CSV file and import.
When you are adding products to your WooCommerce store for the first time, you will have the option to Create Product or Start Import.


Click on the Start Import button and follow the steps to import the products to the store.
Step 1: Upload the file.

This is to make sure that columns in the CSV file match the WooCommerce product data fields.
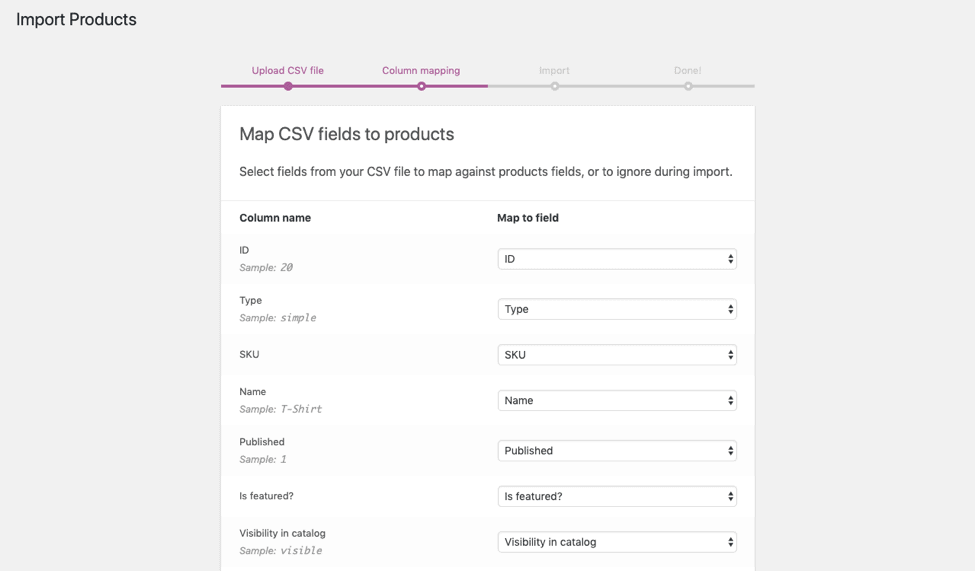

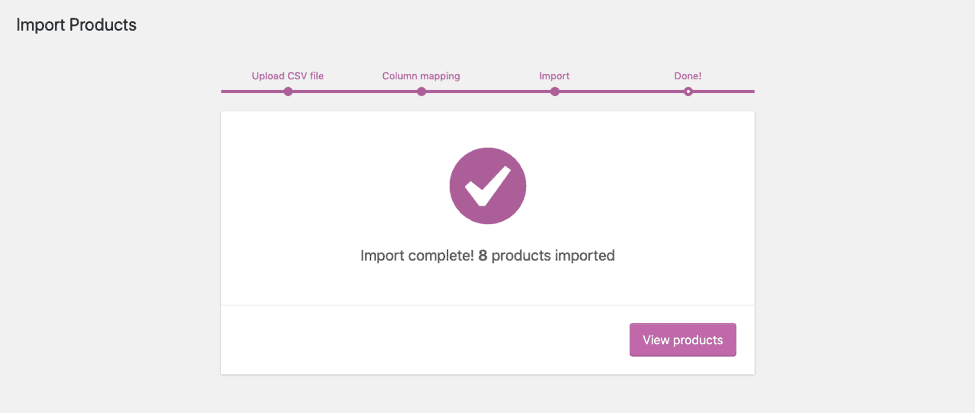
Click on the import button after the product mapping is complete, and the import process will start. After the import finishes, you will get the following message.

Export Products to WooCommerce
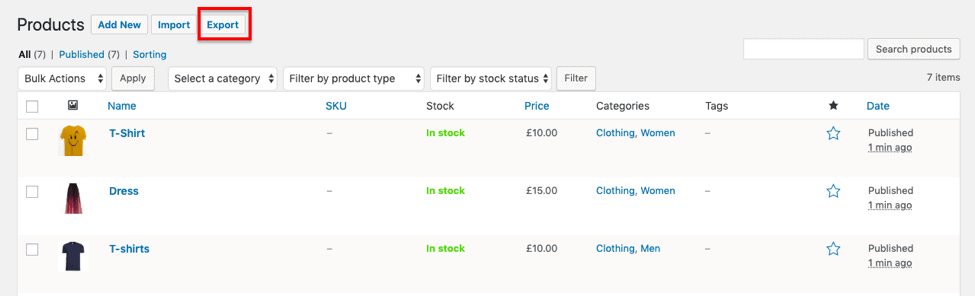
By exporting products in a WooCommerce store, you get all the details of the products in the WooCommerce store in a CSV file. To do that, go to the Products page, and click on the Export button.

Next, you will see a screen from where you can filter the products that you need to export. You can filter the products by product categories and types. Then, decide which of the product columns should be exported and if you want to export the custom metadata for the product.
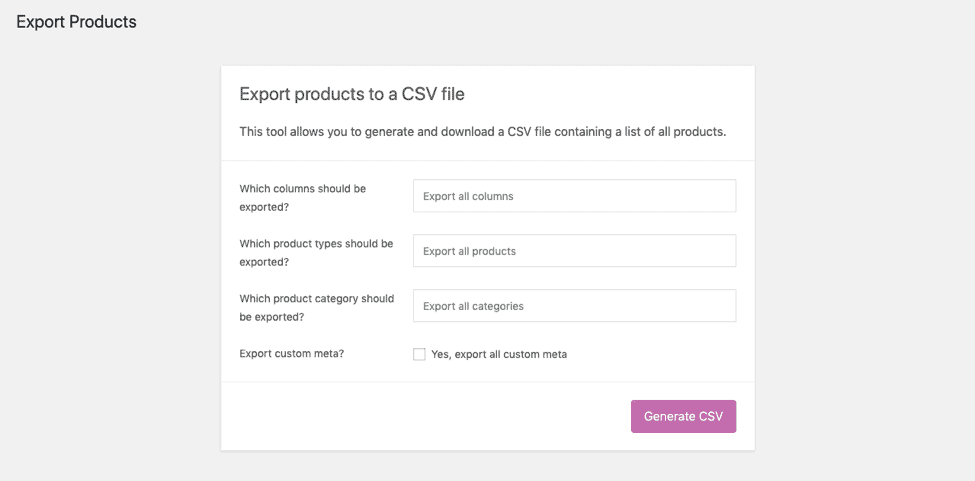

After that, click on generate CSV and the CSV file with the product details will be generated and downloaded to your local computer.
Now, although these features are enough for importing and exporting features, you can get more control over the import and export products using an import-export plugin. Let’s see how we can import and export products and variations using the Product Import Export Plugin for WooCommerce.
Export of WooCommerce Products Using the Plugin
Once you finish with the download and installation of the WooCommerce Import Export Plugin, you are all ready to get started with the export process in your WooCommerce store. Rather than merely explaining the process, let me give you a clear and quick understanding of the working of the plugin with the help of an example.
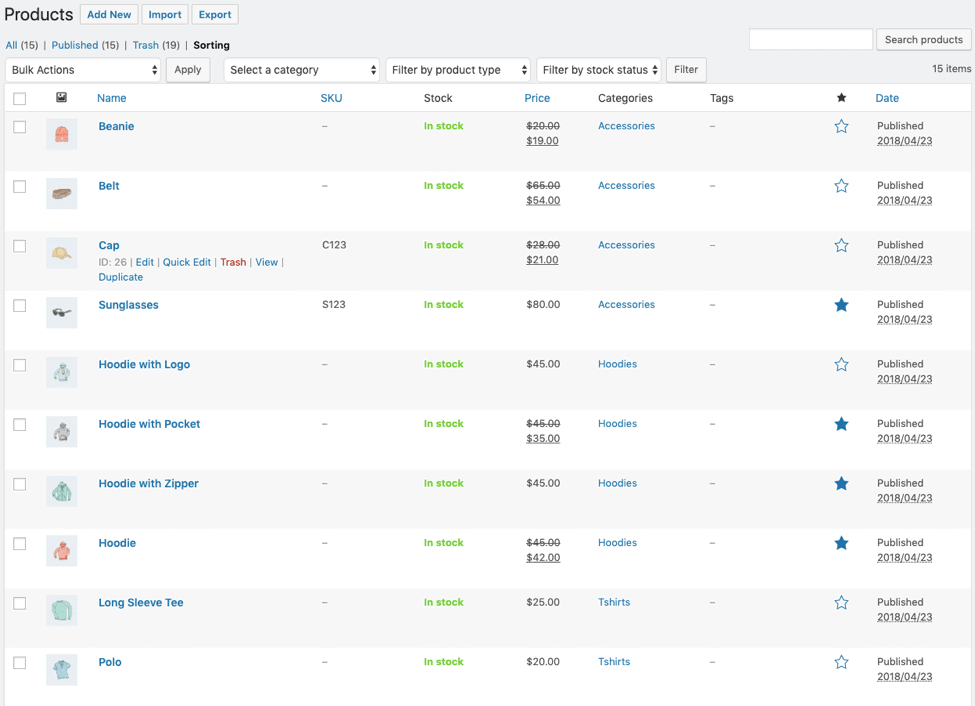

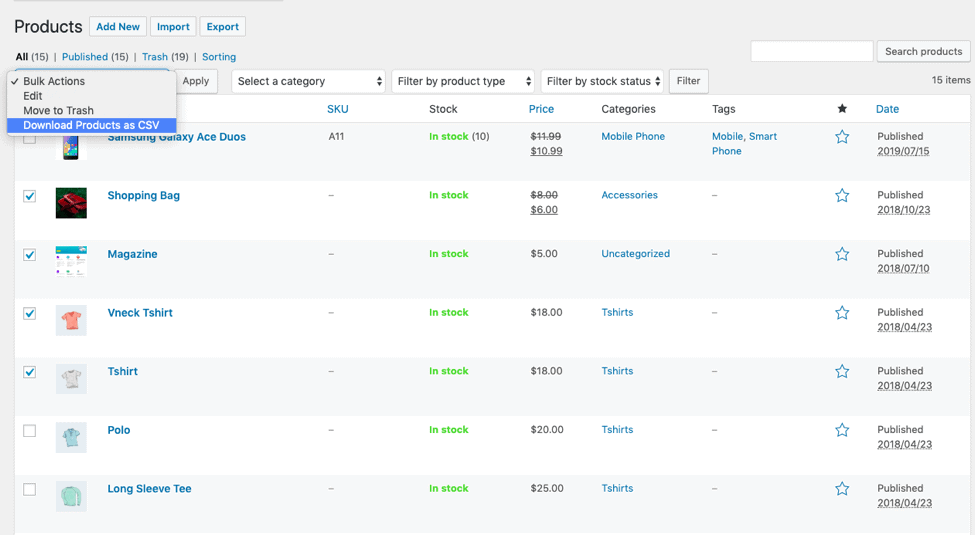
The above product listings page contains ten products belonging to different categories and product types. To export these products, go to the export settings page of the plugin.
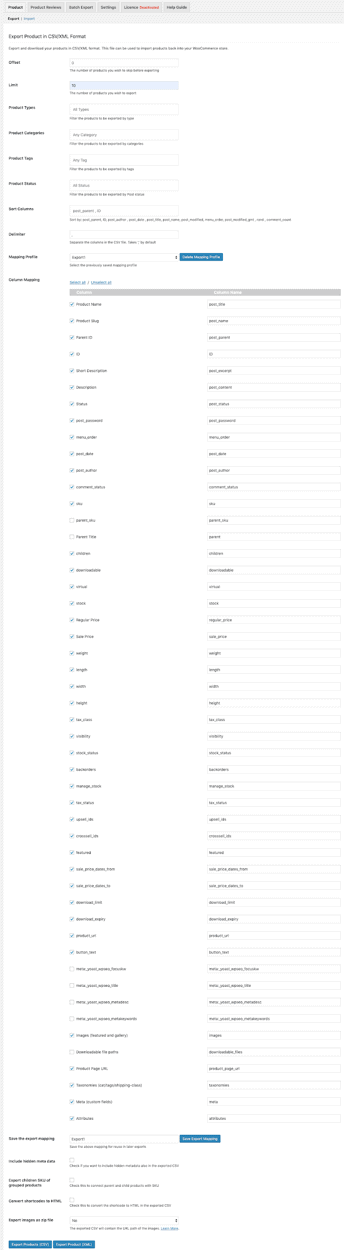

Here, the limit has been given ten since only ten products need to be exported. The offset field is empty as no products are being skipped before export.
The below few options, including product types, product categories, product tags, and product status, are for filtering products that you need to export. You can export products by their type, category, tags, and status. Since we are not filtering products in this particular example, those fields are left empty above.
The next option is for sorting columns of the exported CSV in the way you prefer. You can sort them by post_parent, ID, post_author , post_date , post_title, post_name, post_modified, menu_order, etc. By default, the plugin sorts columns by post_parent which you can change by choosing another one from the drop-down.
In the delimiter option, you can enter the symbol that separates columns in the CSV file. The plugin takes “,” as default. The next option is for choosing a mapping file from your existing list of mapping profiles (so that you can save the time you spend on mapping). In the above example, a previously saved mapping file named “Export1” has been chosen for continuing with the export.
Mapping without an Export File
But, you might not have a previously saved one or you want to create a new mapping profile for export. You can still proceed with the column mapping process. For using the newly created mapping file during future exports, you can save the export mapping file in the next step. The next three options are for including hidden metadata in the CSV, exporting children SKU of grouped products and for converting shortcodes to HTML. You can easily enable it by selecting the boxes across them.
The final option is for exporting images in the form of a zip file. If you chose this option “yes”, the exporting CSV will only have image names in it. A separate image file containing an image path will be created as a zip file. This option is suitable when you have a large number of products to import or if you experience slowness during the import process.
But, if you chose this option “No”, a CSV will generate with all product data along with the image URLs and names. In this example, the option has been chosen “No”. Now, if you click Export products CSV/XML button, the exported CSV will be downloaded.
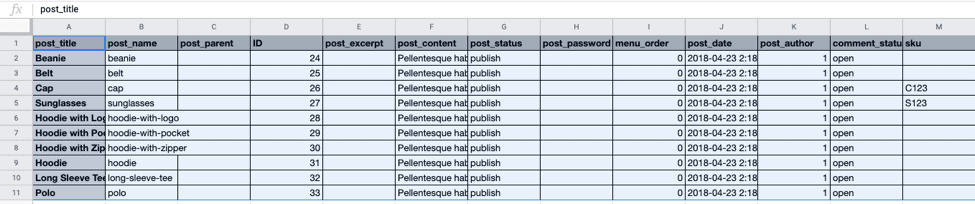
Here is a screenshot of the exported CSV resulting from the above example.

If you want to export product variations alone from your WooCommerce store, you can enable it easily by making slight changes in the export settings page of the plugin.
In the Product types field, choose ‘variable product’ from the options. This will export all variation products from your store.


Direct Product Export Option
If you wish you could skip some of these steps to export products, this plugin provides you with that option as well. Although you won't avail advanced filter options if you chose this mode of export, you will be able to make the export process quick.

Import of WooCommerce Products
For importing WooCommerce products, you may navigate to the import settings page of the plugin. For the import process to work, you need to have a CSV file containing products that need importing. You can either create one or export products in your WooCommerce store to get a product CSV file.
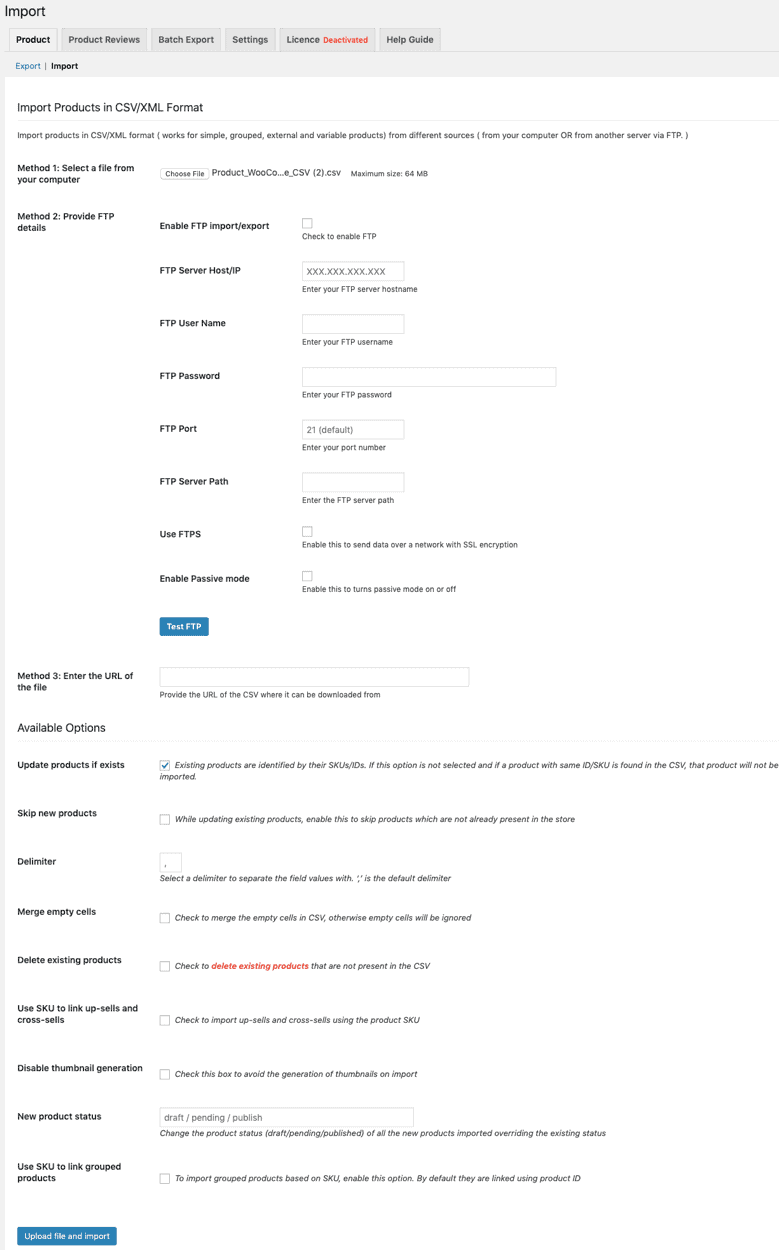

- By uploading a file from your computer
- Via FTP by providing FTP details
- By entering the URL of the CSV file
Upload a file from your computer
In this example, the CSV file has been uploaded using the first method.
If the importing CSV contains existing products, you may enable the ‘Update products if exists’ option to update those products. In case that you do not enable it, products having the same SKU/ID's will not be imported.
If your CSV contains products that aren't already present in your store, you can skip importing those products by enabling the skip new products option. The next option is for choosing a field delimiter, which is “,” by default. With the option to merge empty cells in CSV, you can merge empty cells which otherways will be ignored. If you want to delete products that are not present in the CSV, you can enable the Delete existing products option.
You can easily import up-sells and cross-sells using the link up-sells and cross-sells option provided by this plugin. The plugin autogenerates thumbnail during import, but you can disable it by checking the disable thumbnail generation option. The next option New product status allows you to change the current status of the products to be imported. The final option is for using SKU to link grouped products since they are connected using product ID by default.
Once you click the Upload file and import option, you will be free from the import process.
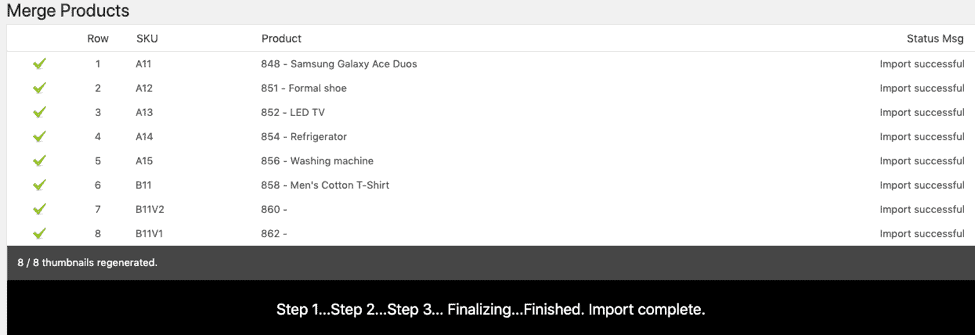
Here is a screenshot of the successful import window.

Conclusion
Running a WooCommerce store can be hard enough with lots of processes going on simultaneously. Thus, your best bet would be going for a plugin. I hope the above article was informative enough to make the right choice.