

Looking to make a lasting impression on your website visitors? Look no further than interactive popups! These powerful tools grab attention and engage users like never before.
No coding knowledge? No problem! Introducing Divi Areas Pro, the ultimate popup plugin designed specifically for your Divi website. With Divi Areas Pro, creating and customizing interactive popups is a breeze.
In this blog post, we'll show you how to create interactive popups by using Divi Areas Pro’s remarkable features. Get ready to elevate your website's UX to new heights!
Let's dive right in and discover the magic of Divi Areas Pro.
Benefits of using Divi Areas Pro
In the ever-evolving landscape of conversion rate optimization, having the right tools at your disposal is vital if you want to create an engaging and captivating website.
Enter Divi Areas Pro, a powerful plugin designed to take your Divi theme-powered website to new heights.
With its array of features and intuitive interface aligned with Divi Builder, Divi Areas Pro provides a myriad of benefits that empower you to create engaging popups that leave a lasting impression on your visitors.
Divi Areas Pro offers several important advantages for creating popups, including:
- Seamless integration: Divi Areas Pro seamlessly integrates with the Divi theme and the Divi Builder, allowing you to leverage their powerful features.
- Customizability: With Divi Areas Pro, you have complete control over the design and behavior of your popups, enabling you to create unique and interactive experiences for your visitors.
- Advanced triggers: The plugin provides a wide range of triggers that can activate your popups, including scroll, click, time, and exit intent triggers. This ensures that your popups are displayed at the right moment, maximizing their impact.
- Targeted display rules: Divi Areas Pro allows you to define specific display rules for your popups, ensuring that they appear only on the desired pages or posts.
- Robust API: At the foundation of the plugin is a battle-tested, highly flexible API that you can integrate into your theme to take your website to the next level.
- Help and Support: Every feature in the plugin has an inline help section. When you have a question, you can get in touch via the Live Chat on our website.
By providing a user-friendly interface, endless customization possibilities, precise targeting options, and seamless integrations, this powerful plugin empowers you to create captivating websites that leave a lasting impact on your visitors.
Understanding Divi Areas Pro: A brief overview
So, what exactly does Divi Areas Pro bring to the table? Picture yourself effortlessly crafting stunning pop-ups and eye-catching notification bars that will have your visitors doing double takes.
With its drag-and-drop builder, there’s no coding wizardry required—only pure creative freedom!
With surgical precision, you can choose precisely where and when your custom popup makes its grand entrance.
You call the shots, and Divi Areas Pro delivers the perfect message to the perfect audience, creating a brilliant UX that leaves your competition in the dust.
Seamlessly integrate your custom areas with email marketing platforms, social media sharing tools, and more. The possibilities are endless, and the time and effort that is being saved, priceless.
To get started with Divi Areas Pro, you need to install and activate the plugin license on your website.
Step 1: Installing and activating Divi Areas Pro
So, are you ready to take your website to the next level? First things first, let's grab the magical plugin itself.
Installing Divi Areas Pro is the first step towards skyrocketing your website's potential and leaving your visitors begging for more.
Now, Divi Areas Pro isn't just any run-of-the-mill plugin: It's the flagship of Divimode’s arsenal, hosted on divimode.com and the renowned Divi Marketplace.
This means that you have two easy options to grab this game-changing plugin: Head straight to Divimode's website or dive into the Divi Marketplace — whichever floats your boat!
Once you're there, unleash your download powers and secure the plugins zip file — it's your golden ticket to interactive popups! Follow the usual route to install the WordPress plugin on your site:
Navigate to Plugins > Add New, access the ‘Upload Plugin’ button, choose the zip file, and hit the “Install Now” button to start the process.
Find the activation button, give it a swift tap, and congratulations! You've successfully activated the powers of Divi Areas Pro onto your Divi website.
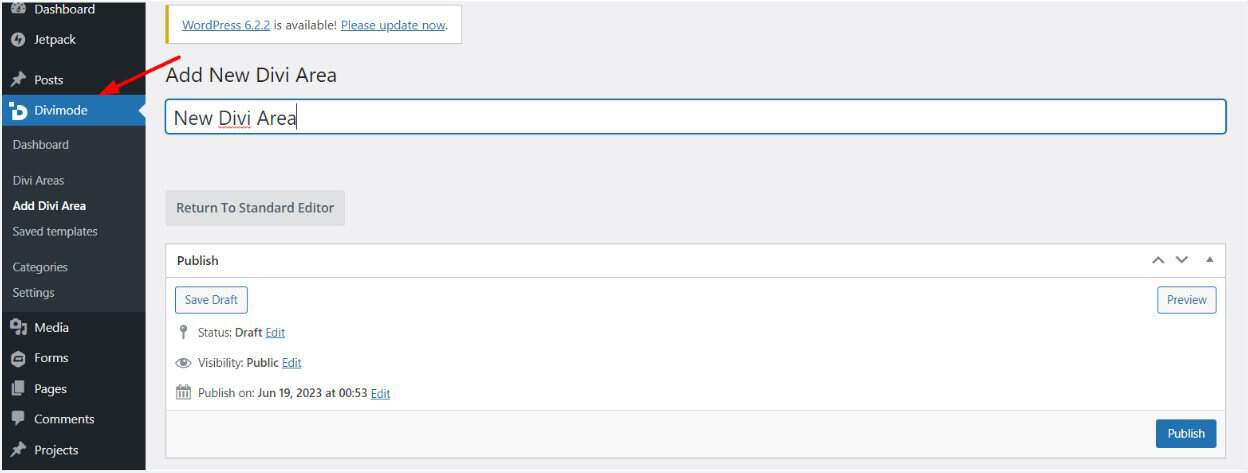
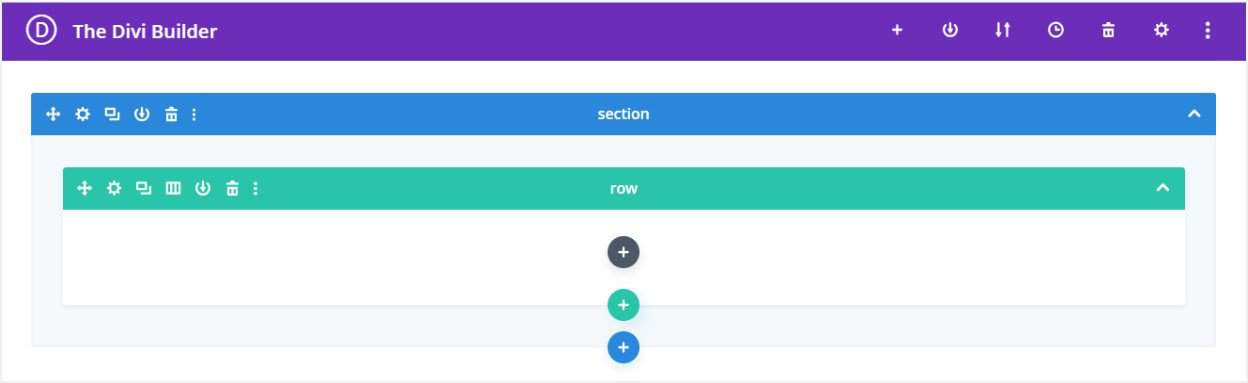
Step 2: Creating a new Divi Area
After activating Divi Areas Pro, you can start creating your interactive popups. Follow these steps.
From the WordPress dashboard, go to ‘Divimode’ > ‘Divi Areas’ and click on ‘Add New’. Enter a name for your Divi Area to identify it easily.

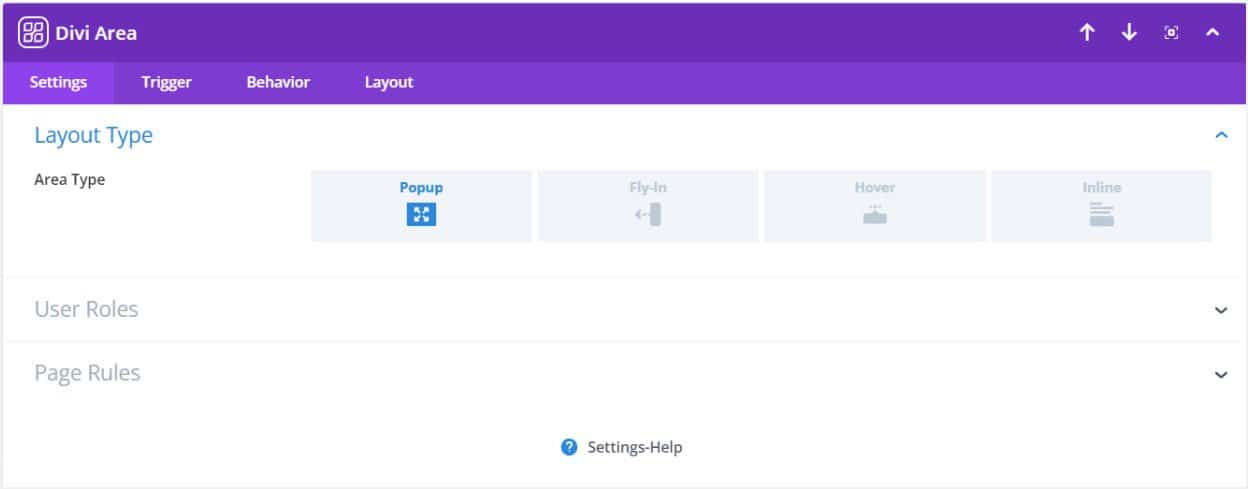
Scroll below to the Divi Area settings and choose the Popup option as the Divi Area Type.

Now, configure the settings for the Divi Area in the Layout tab, such as width, height, overflow, etc.
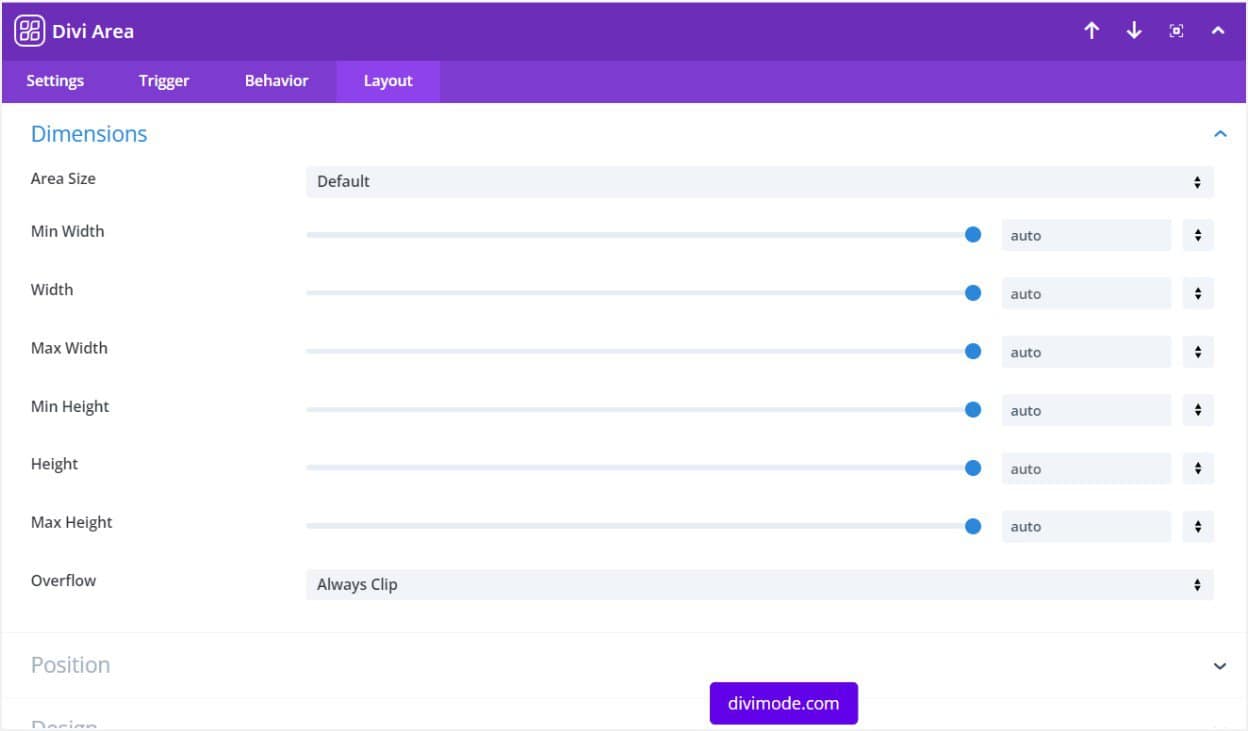

To end the first configuration of your interactive popup, save the settings and finish by establishing the new Divi Area.
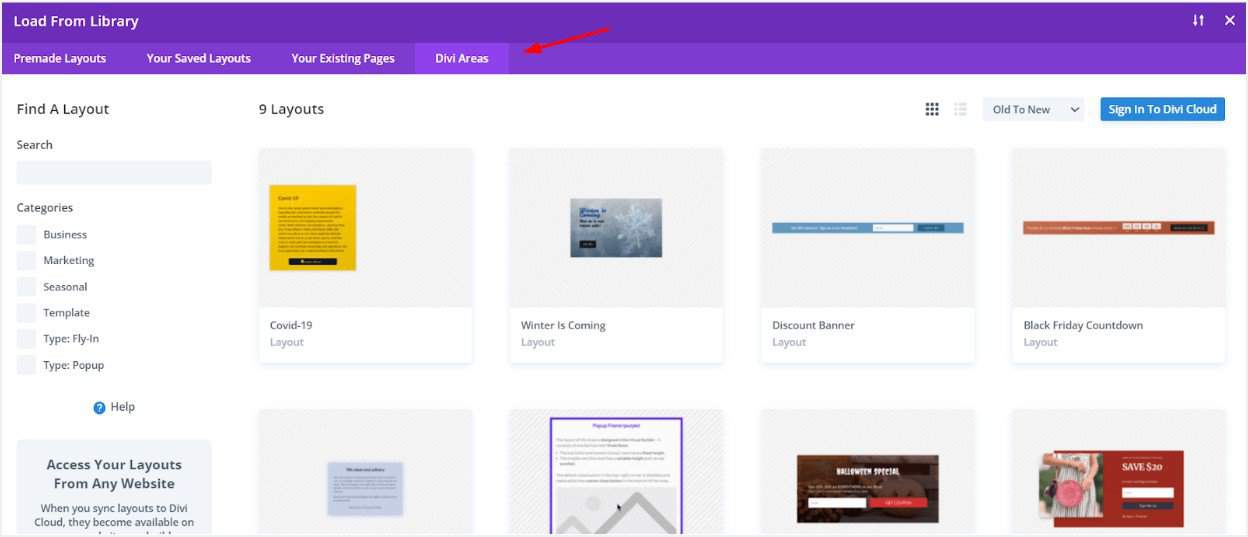
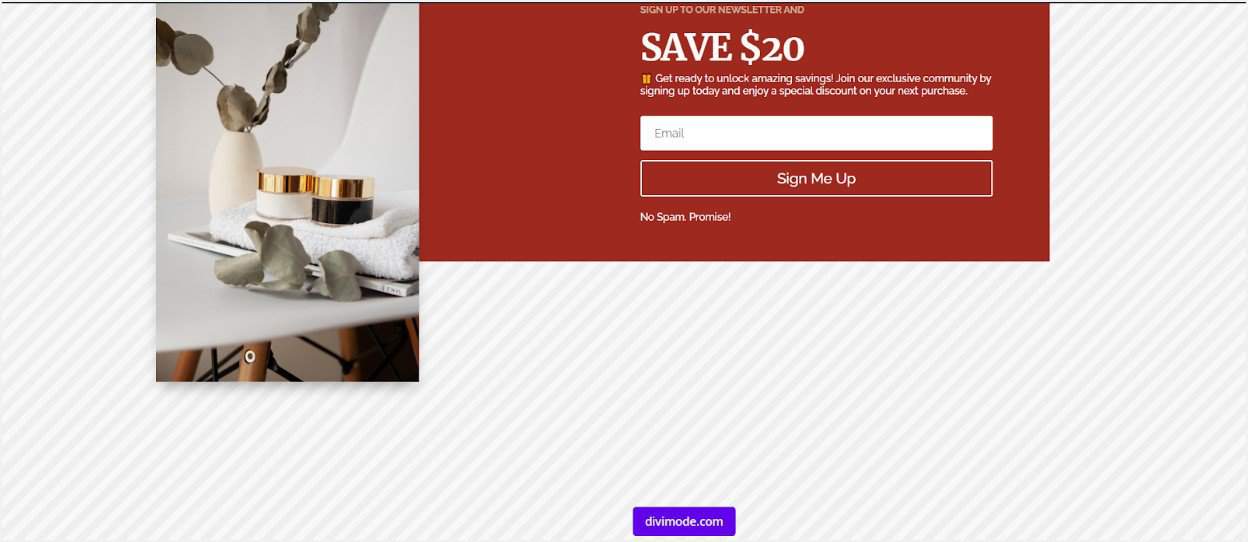
Step 3: Designing the interactive popup
In this step, you will design the layout and content of your interactive popup using the Divi Builder.
Here's what you need to do:
Scroll above the Divi Area settings and find the Divi Builder section for your Area.

Use the Divi Builder's drag-and-drop interface to add modules and customize the layout. If you choose the Load from Library > Divi Areas option, you will find our ready-made layouts from our Library, which will be updated with even more layouts pretty soon!

Next up, you need to customize the appearance of the popup by adjusting fonts, colors, backgrounds, etc.
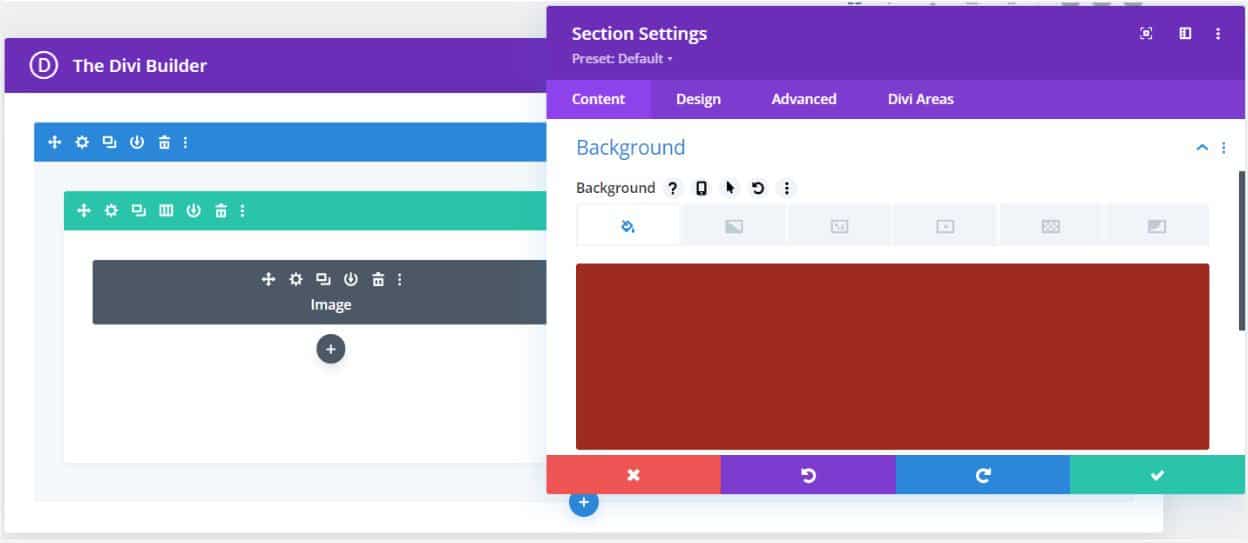

When you’re satisfied with the design, save your changes. It’s that simple with Divi Areas Pro!
Step 4: Adding custom triggers to the popup
Now, to make your interactive popup appear at the right time and place, you need to set up the right custom triggers.
Luckily for you, Divi Areas Pro has all the triggers and popup behaviors you need for higher user interaction:
- Time-based Triggers: Effortlessly create Popups that appear after a specific duration. Set the duration to “0.0” for instant display upon page load.
- Scroll-event Triggers: Utilize scroll-events to gauge user engagement effectively. Simply define a scroll-distance in either percentage or pixels.
- Exit-Intent Trigger: Engage visitors before they leave your page effortlessly. Enable the Exit-Intent behavior (not available in Popups for Divi, our free plugin), and let Divi Areas Pro take care of the rest.
- Back-Button Trigger: Seamlessly intercept back-button clicks and showcase a Popup or Fly-In instead. Enjoy reliable performance across all devices.
- Click and Hover Triggers: The classics: Trigger a Popup by clicking a button, image, or any specified CSS ID or Class. Sit back and watch engagement soar.
To set up one of the triggers, in the Divi Area settings, navigate to the Trigger-tab.


Decide whether you want to use one of the myriad of trigger rules that Areas Pro offers, or you want a custom trigger that you can build using our powerful JS API (the tutorials are already available along with the documentation).
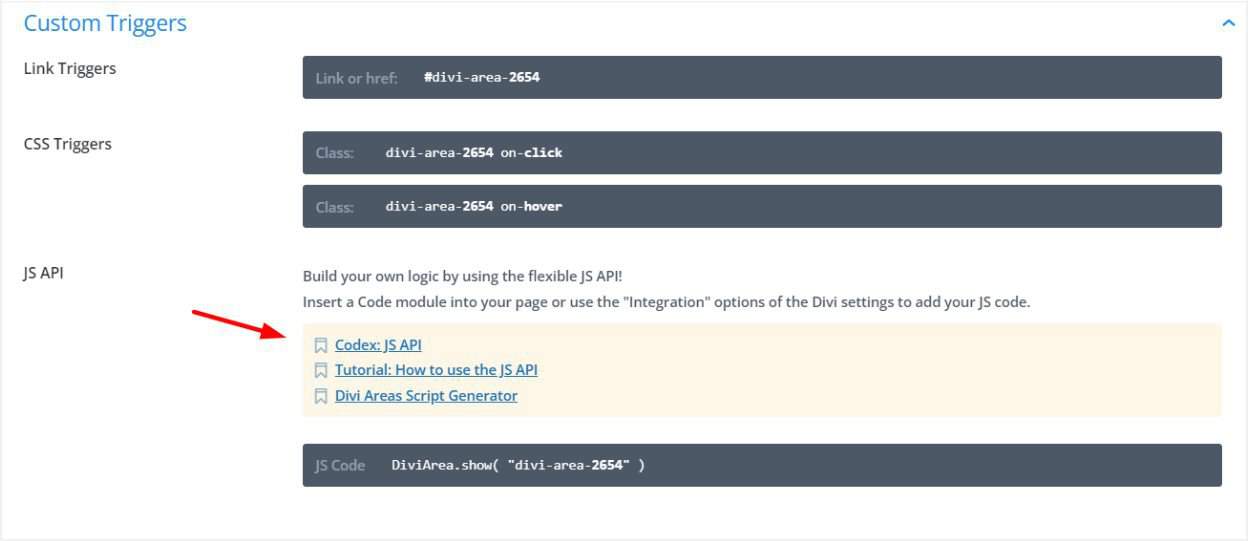

For starters, you can use one of the standard triggers, for example, the Scroll or Click trigger. In the Trigger Rules section, click on Add New, choose On Scroll, and pick either the distance or the element where you want the scrolling to activate the popup.
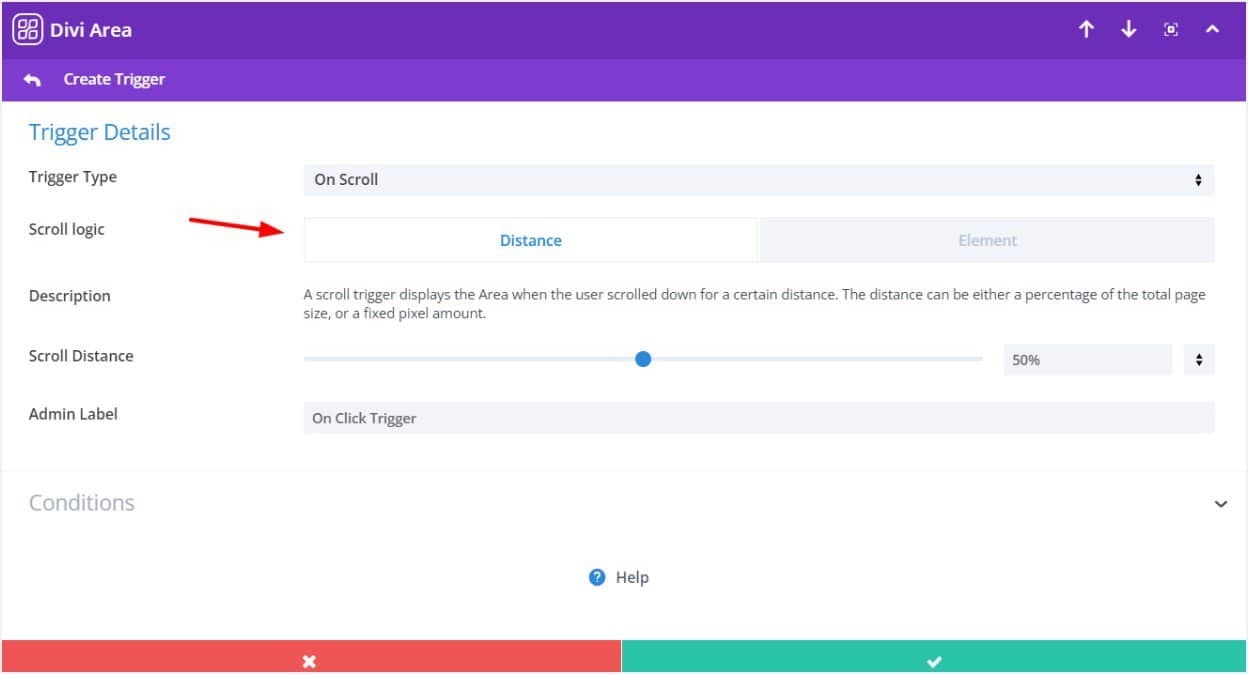

Then, simply save the settings to apply the trigger/s to your popup.
Step 5: Setting up page display rules for the popup
Divi Areas Pro also allows you to define display rules to control where and when your popups appear. The Areas Pro conditions and display rules include the following options that allow you to refine your popup targeting options:
- Targeted Posts or Pages: Choose specific pages or posts where you want to show (or not show) a Popup, giving you full control over your content's visibility.
- Device-Based Targeting: Easily disable an Area on different device types such as “Desktop,” “Tablet,” or “Mobile,” ensuring optimized UX across platforms.
- User Role Conditions: Show different content to guests compared to logged-in members, tailoring the experience to specific user groups.
- URL and Referrer Checks: Trigger Areas based on specific URL parameters or referrers, including search engine referrers.
- Powerful Inline Conditions: Opt for Inline Areas to be displayed “Before,” “After,” or “Instead Of” any other Divi Section.
- Flexible Inline Locations: Replace a section by utilizing CSS ID or Class, or position the Inline Area into various Theme Locations.
- Date Conditions: Schedule your Areas to display during specific date ranges or define a weekly schedule.
To set up the display rules for your popups, simply do the following.
In the Divi Areas editor, go to the Page Rules section, then click the Page Limitation button.
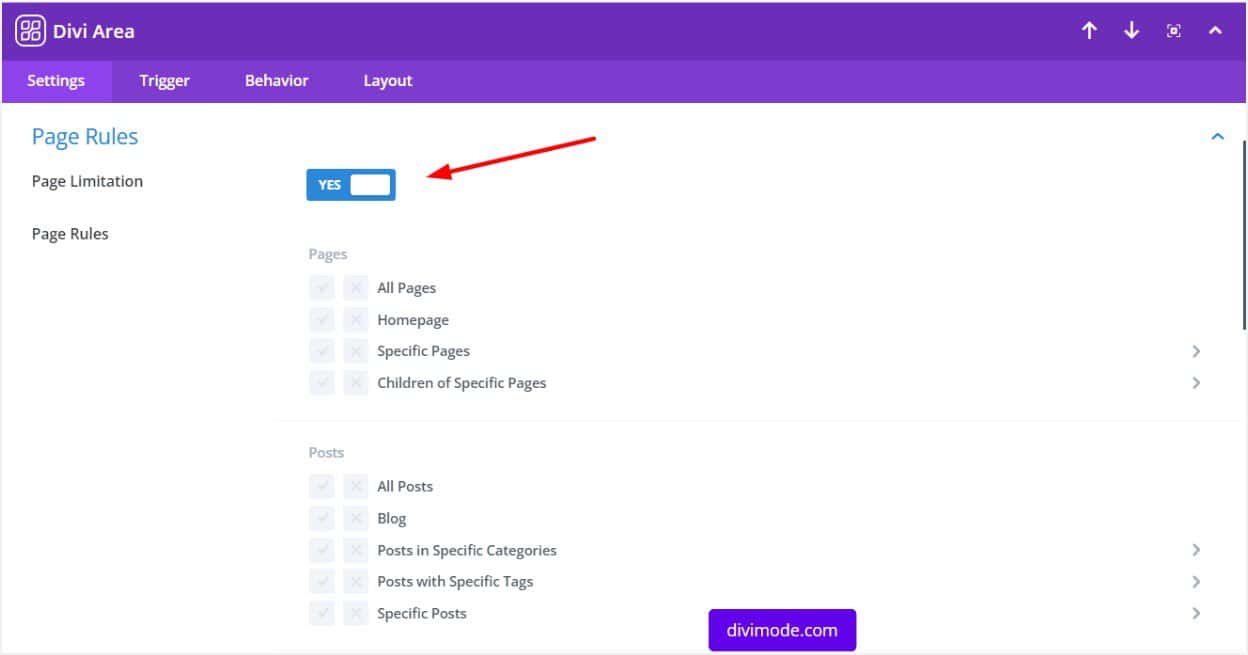

Select the appropriate display rules and choose the specific pages where you want the popup to be displayed, as well as the specific pages or posts where you don’t want to be displayed.
Save the settings to apply the display rules to your popup. It’s that easy!
Step 6: Testing and optimizing the interactive popup
Before publishing your interactive popup, the last critical step is to test and optimize its performance.
Luckily, everything is effortless in Divi, including testing your Divi Areas Pro popups.
When you’ve set all the display rules for pages/post and the trigger preferences, simply preview your popup on different devices and screen sizes to ensure responsiveness.

Make sure to continuously monitor and optimize the popup's conversion rates and engagement metrics.
FAQs about Divi Areas Pro
Are there any limitations on the number of interactive popups I can create? No, you can create an unlimited number of interactive popups using Divi Areas Pro.
Do I need to also install Popups for Divi?
No, Divi Areas Pro is a stand-alone plugin that includes all Popups for Divi features. To use Divi Areas Pro, you only need either the Divi theme or the Divi Builder plugin.
Can I target specific user segments with my interactive popups?
Yes, Divi Areas Pro allows you to set up display rules based on specific user segments, such as location, device type, or user roles.
Can I use Divi Areas Pro to create other types of custom areas, apart from popups?
Yes, Divi Areas Pro is versatile and allows you to create various types of custom areas, such as fly-ins, notification bars, or full-screen overlays.
Is Divi Areas Pro beginner-friendly?
Yes, Divi Areas Pro is designed to be user-friendly, even for beginners. Its intuitive interface and drag-and-drop builder make the process easy to understand and implement.
Does Divi Areas Pro offer customer support?
Yes, Divi Areas Pro provides customer support through the official website. You can access documentation, tutorials, and contact the support team if needed.
Can I integrate email marketing services with Divi Areas Pro?
Yes, Divi Areas Pro offers integrations with popular email marketing services, allowing you to capture leads and grow your email list through your interactive popups.
Conclusion
Creating interactive popups with Divi Areas Pro is a straightforward process that offers numerous benefits for your website.
By following this step-by-step guide, you can leverage the power of Divi Areas Pro to engage your visitors, capture leads, promote offers, and enhance user experience.
Don't wait any longer. Join the countless website owners who have already transformed their online presence with Divi Areas Pro.
Upgrade your website today and experience the difference firsthand!